In this month’s behind the scenes look at LogToVolume, coming soon to provide you with next generation depth conversion, we explore the LogSpread element of the toolset.
The following snapshots of the software are not in a finished state, as they are missing icons and the final aesthetic details of the finished product. However, you will get a feel for the ease-of-use of the tool and gain an understanding of the step-by-step nature of the final result.
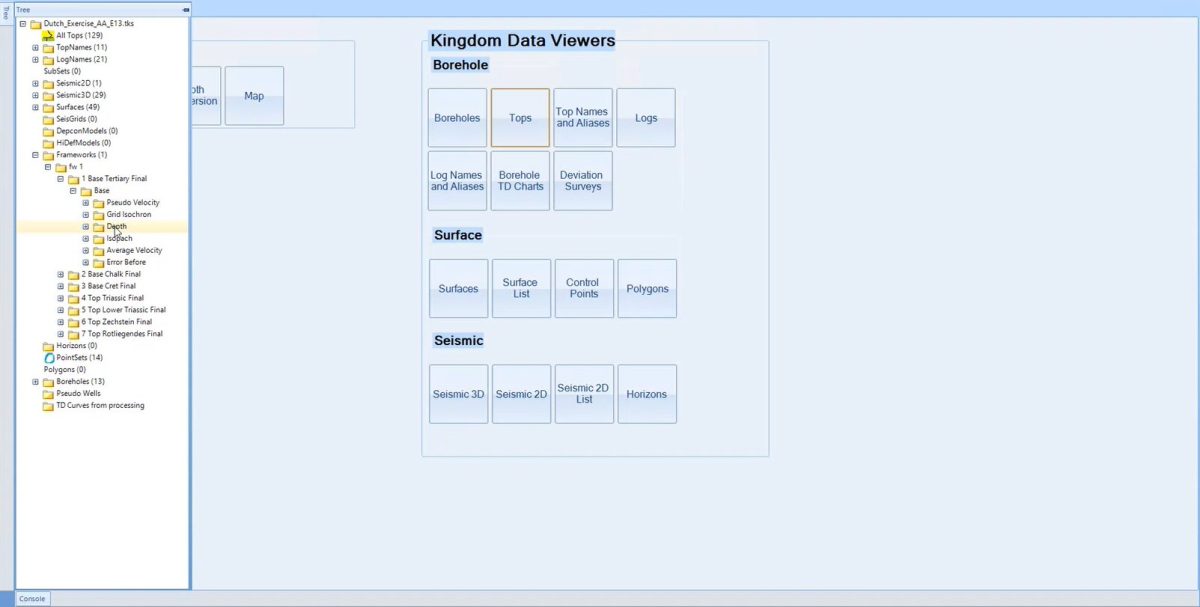
Last month, we looked at the creation of a Framework as the basis of your model. Once this step is complete, the datatree on the left hand side will contain all the relevant data of your Framework, ready to use for the purpose of the next step in the workflow; Log Spreading.
LogSpread
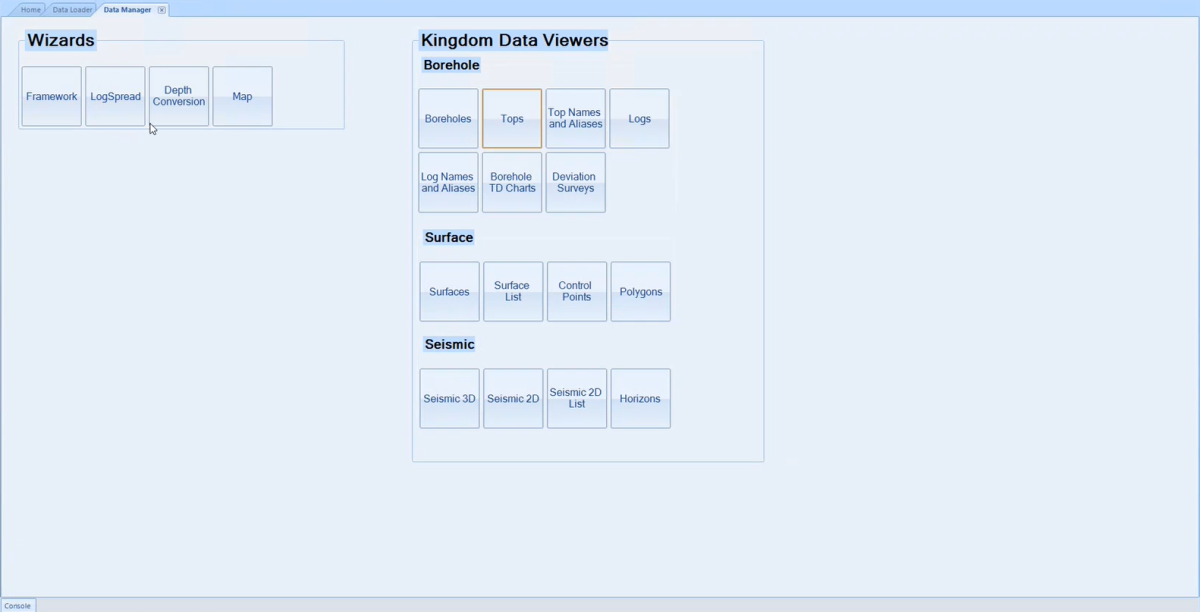
On the homepage you can now select the LogSpread tool.
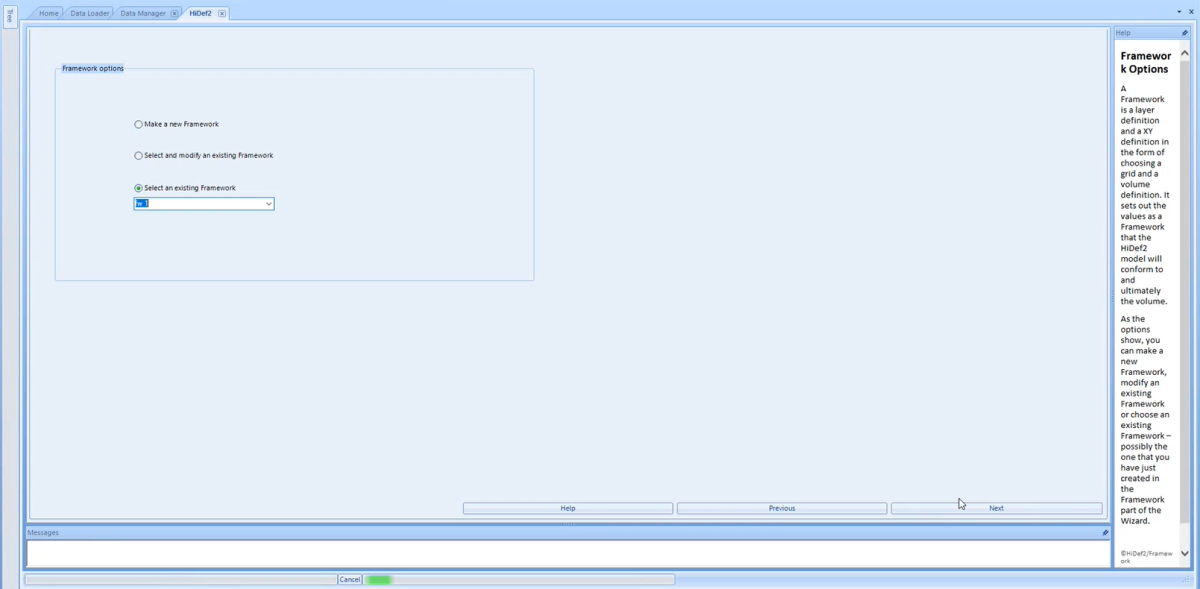
Here, you have the option to either Make a new Framework, Select and modify an existing framework, or Select an existing Framework. Having completed the building of the Framework in the last stage, you can choose it from the dropdown menu and press Next to continue.
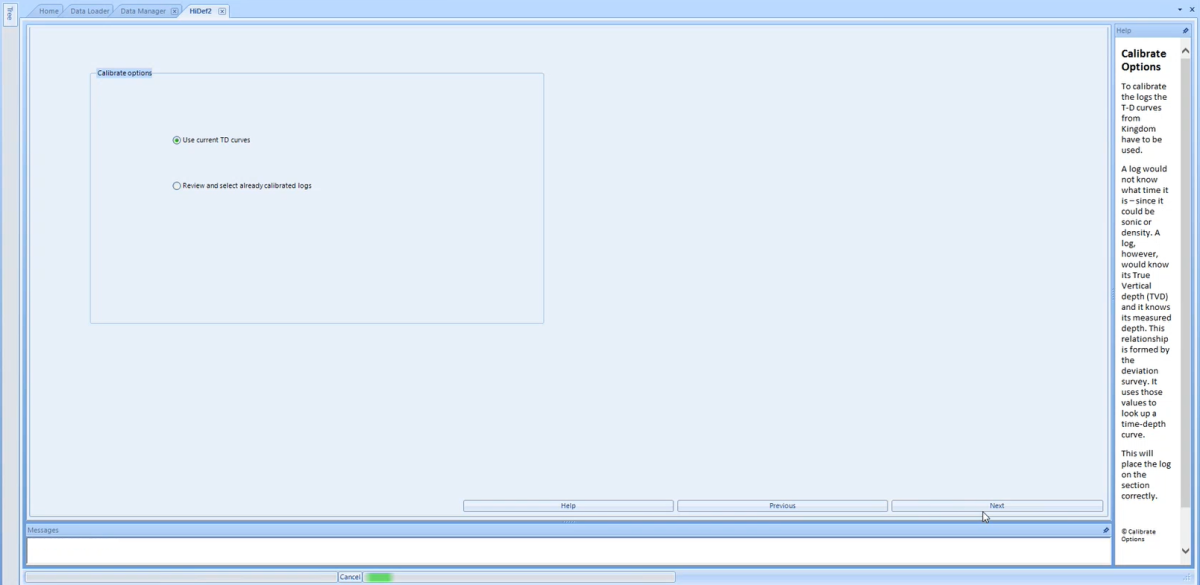
You are then presented with two calibration options. You can either use the current TD curves or you can Review and select already calibrated logs. At present, these are the only two options available, but an additional option may be provided at a later date. You can then press Next to move to the next page.
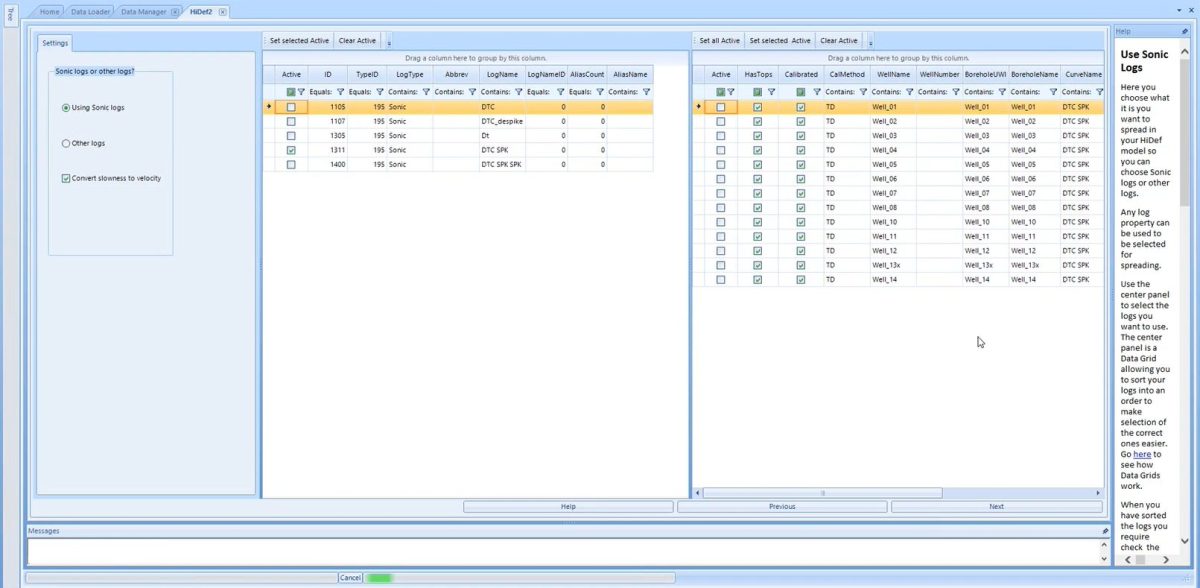
On this screen you’re able to select the logs you wish to perform the log spreading on. This can either be as the property of Velocity from your Sonic logs, or any other petrophysical log, for example. The middle panel enables you to select which logs you want to use as active. Once selected, the panel on the right gives you a visualisation of the logs contained within your chosen set(s).
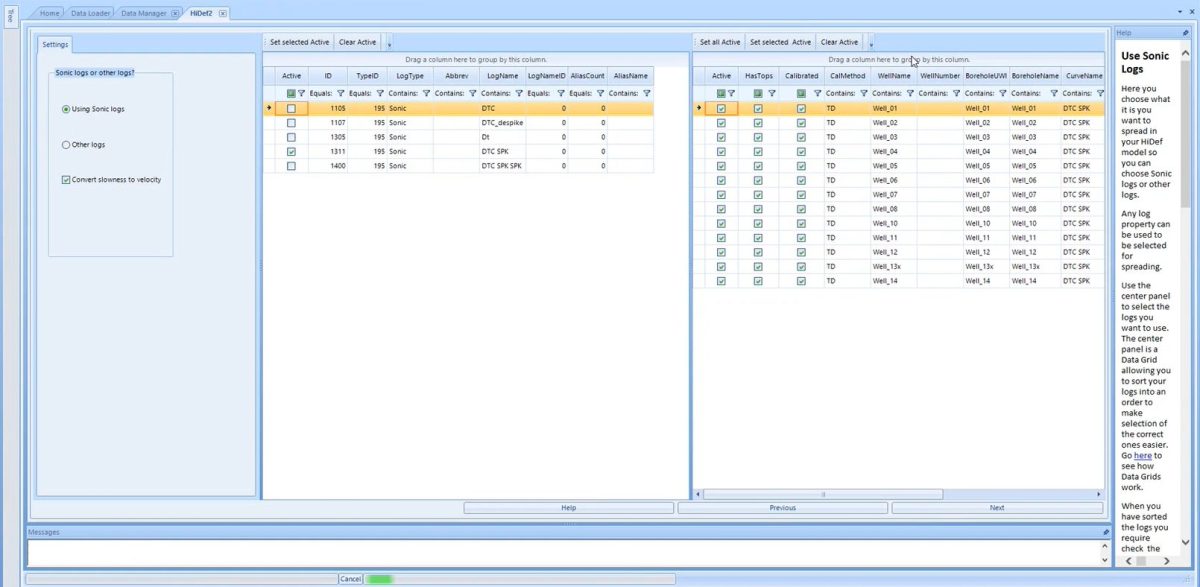
By clicking on Set All Active, or individually ticking the relevant wells you wish to use, you have control over the data that is going to be included in the LogSpread process. Once you have completed this step, press Next to move forward.
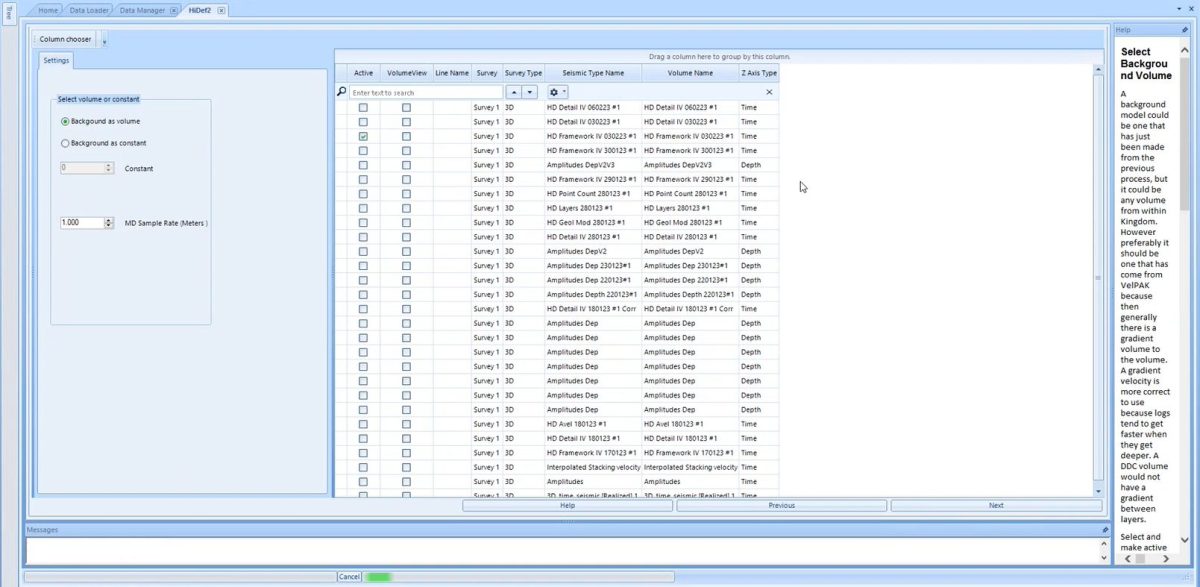
The next page is where the background model is selected. The simplest case is to use a previously created Interval Velocity Framework. Alternatively, this can be the output from VelPAK/Velit, from a PSDM or a smoothed processing velocity volume. When you have made your selection, you can press Next to continue.
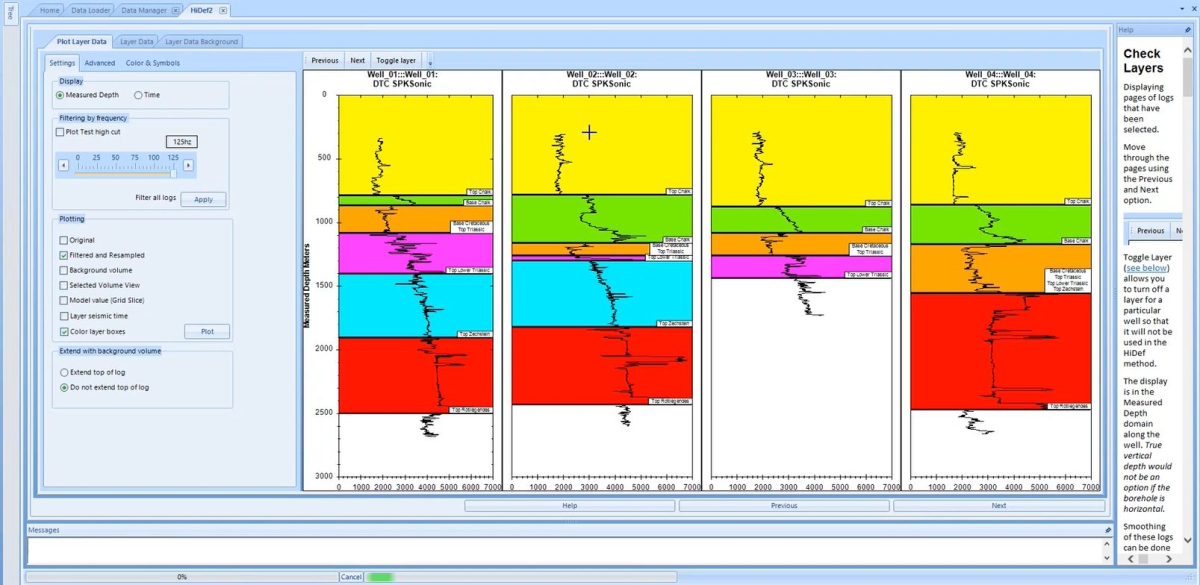
This page now shows you your logs and your layer definition and uses the colours of your layers, as per your selection in Kingdom. On this page you can interact with the display and choose to toggle individual layers on and off, as well as displaying the background model used to compare with the logs.
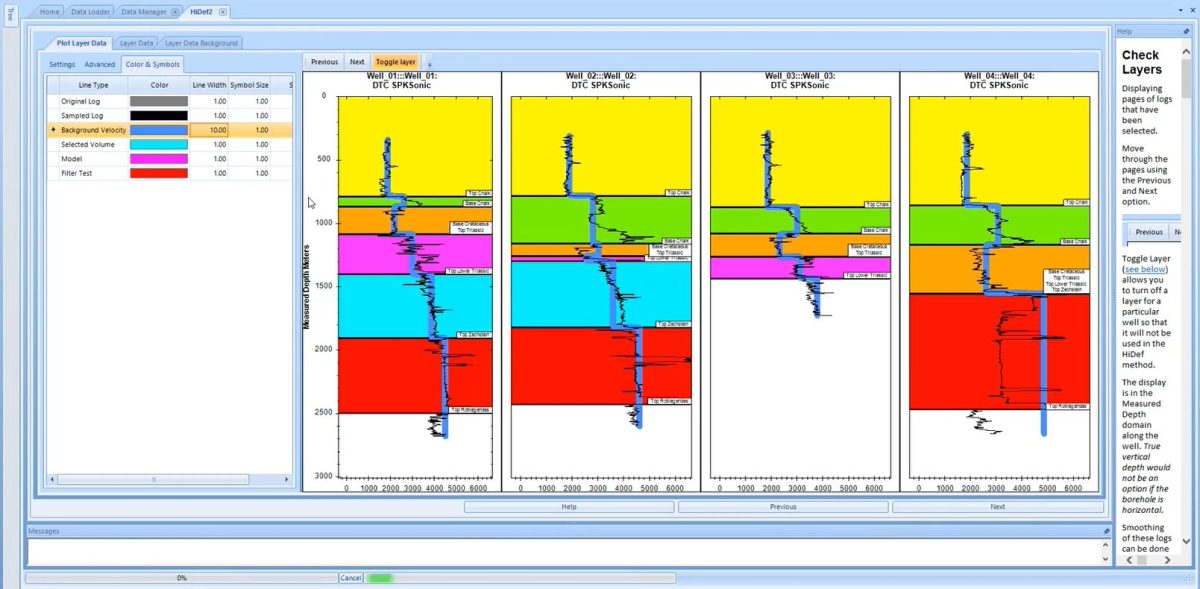
Here, you can see the panel enables you to adjust the Line Width and Symbol Size, as well as being able to select the colour of each of the different Line Types available.

You also have to option to extend the top of the log to the surface, by simply selecting the option in the lower panel on the left hand side.
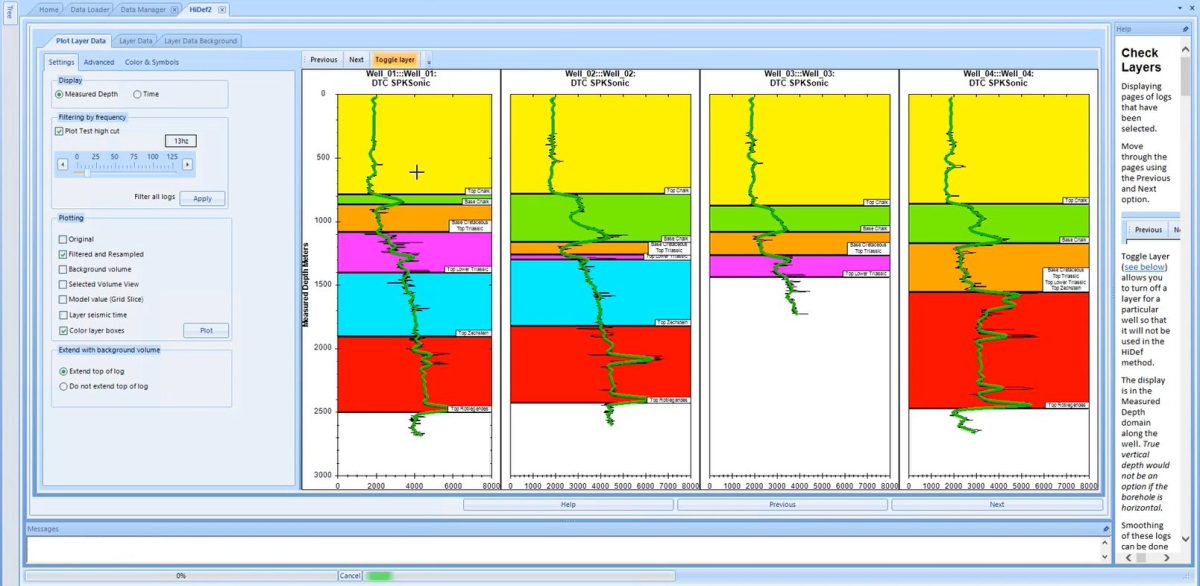
Lastly, you can filter your logs by frequency. This is calculated dynamically by computing the Nyquist Frequency of the data as the maximum. In this case, as 4ms sampling of the seismic, a maximum of 125 Hz is possible, but typically we want to filter this down toward the low frequency part of the spectrum. If you now click Apply, you can take out the detail of the Sonic log and use the smoothed filtered log to be spread instead. This is all computed in the Measured Depth domain and along deviations. Once you have set this up in the way you desire, you press Next.
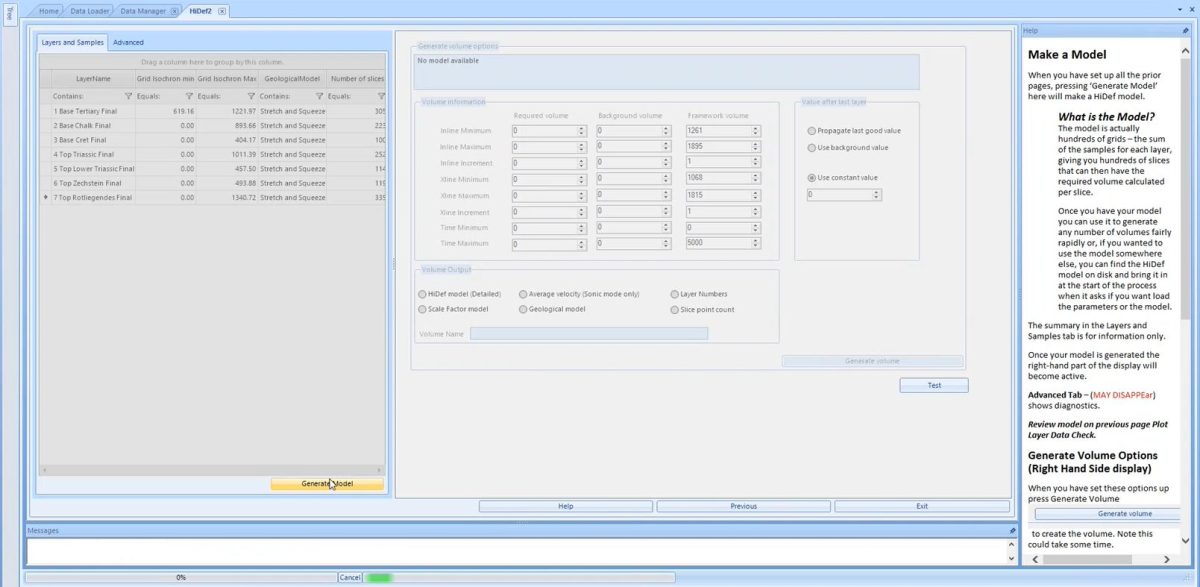
Lastly, you’ll move to this page where the only option you are presented with is to Generate a Model. On selecting this, the software will process the data over about 1 hour and generate a model containing hundreds of grids. This is then saved within the software and will be subsequently available for the creation of a volume. Here you can select a High Definition model, an Average Velocity model, a Geological model, etc, which can then be opened in Kingdom for the final visualisation.
You can hopefully see how you will be able to generate quite powerful and useful products in this very easy to use Wizard.
If you have any questions about the new developments of our software, or want to discuss our other products, or the depth conversion training courses we provide, then please get in touch with us at sales@equipoisesoftware.com where we’ll be happy to discuss your questions in more detail.